
Watch the video:
0:00 - Intro/Explanation
0:15 - Does your motherboard support UEFI?
1:14 - Check if drive is GPT or MBR
2:04 - Bitlocker
2:44 - Convert MBR drive to GPT
3:54 - Enable UEFI mode
Why convert MBR to GPT?
MPR (Master Boot Record) and GPT (GUID Partition Table) are ways that data is partitioned on a drive. GPT is the new standard, and MBR is mainly used on older hardware with disks under 2TB.
While there isn’t a performance difference, usually. Converting is required for enabling secure boot and related features.
While the conversion is simple, it’s important to check your system is compatible before changing anything.
Verify compatibility
Press Windows+R or Start+R, type msinfo and hit Enter to open System Information (You can also search for that in the start menu).
Inside here look for BaseBoard Manufacturer and BaseBoard Product. This is your motherboard’s manufacturer and model number. This will become important shortly.

With this information you need to check if your motherboard supports a UEFI mode. On most even semi-modern motherboards this is on by default, but you may still be on BIOS or legacy mode.
Google <Manufacturer> <Motherboard Name> Enable UEFI, for example: Gigabyte Z790 AORUS MASTER Enable UEFI. We’re not going to follow these guides just yet, we’re just verifying enabling UEFI mode on our motherboard is possible.
We’ll return here later - While you can enable UEFI mode now, to save a restart we can delay this to later. Just make sure your motherboard supports UEFI. I. If you follow with this guide, and your motherboard doesn’t support UEFI mode, it may be unable to boot until you undo your changes.
Verify if drive is GPT or MBR
Your drive may already be in the newer format, so we can check with this simple method:
- Hit
Startor theWindowskey. - Search for
Partition - Click to open
Create and format hard disk partitions, orDisk Management. - Locate the drive where Windows is installed in the top list, usually
C:drive, and click it.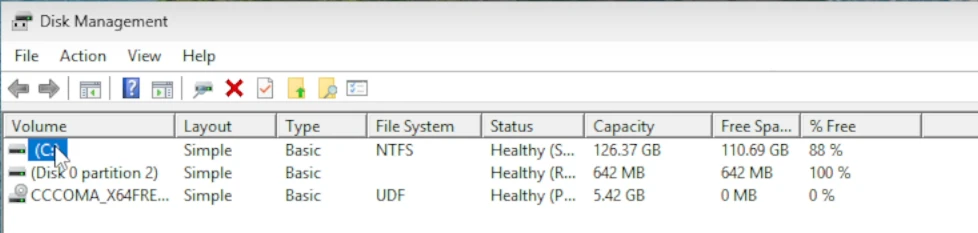
- This will highlight a block on the bottom half of the Disk Management utility, showing you your drive number - Mine is
Disk 0: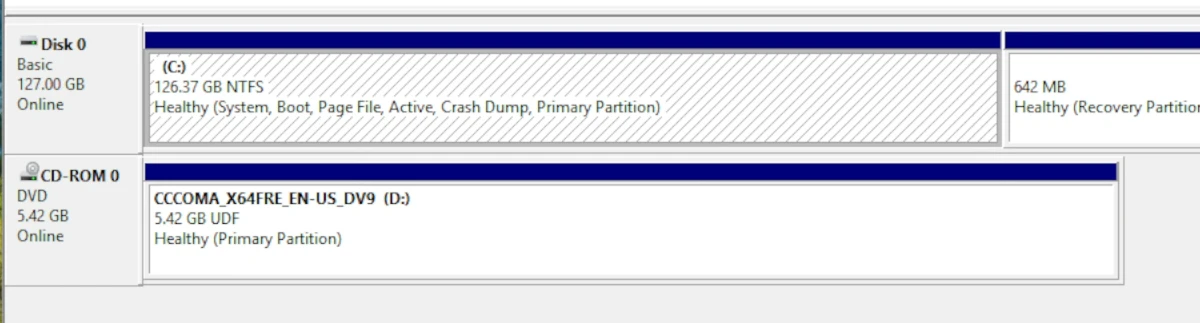
- Right-click
Disk 0on the far left of the blovks, and chooseProperties.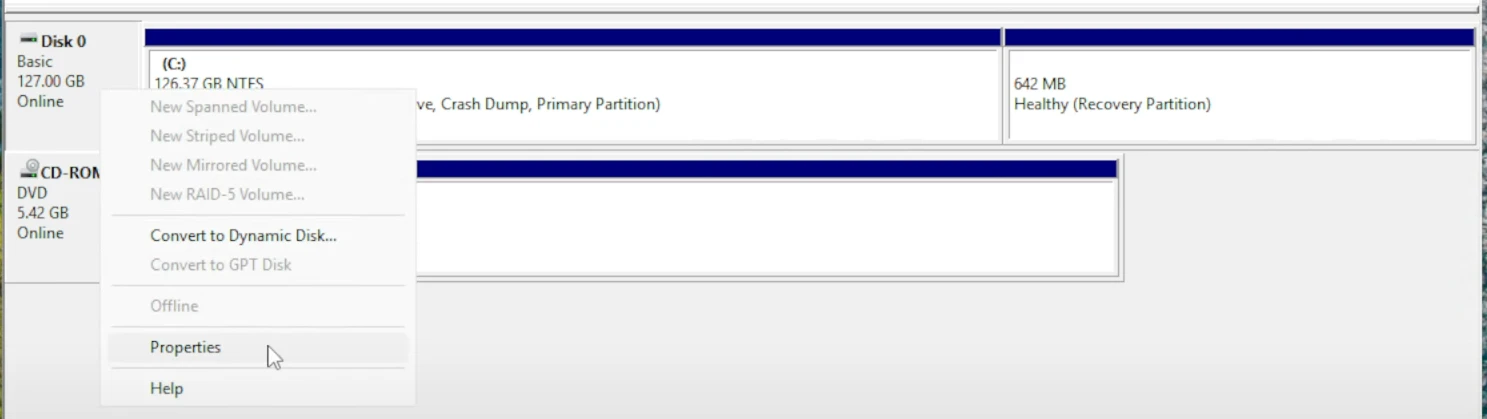
- Head to the
Volumestab and see what your drive is set to next toPartition style:. You will either see MBR or GPT. If yours is GPT, then you can skip to enabling UEFI mode!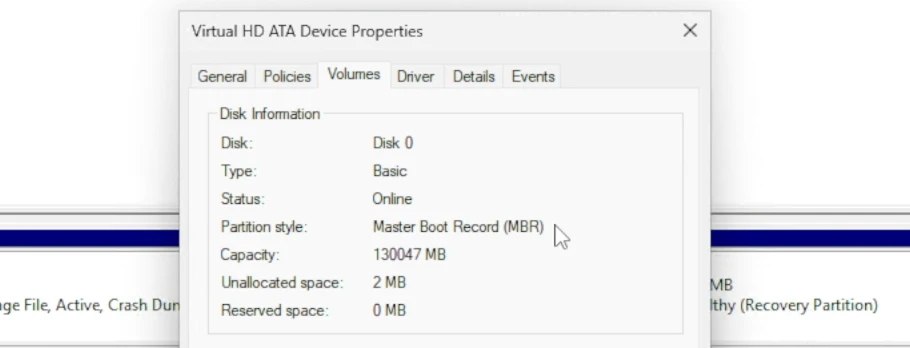
Converting an MBR drive to GPT
There’s a few important prerequisites:
- Make sure your data is backed up. While data loss is unlikely, it’s always possible with any changes.
- If you have a Bitlocker enabled, disable it. You can check this by hitting
WindowsorStartand searching forBitLocker. OpenManage BitLockerand turn it off. While the conversion might be possible with BitLocker on, it’s a good idea to make sure it’s off.
Method 1: Partition Manager
The simplest method to convert is using Partition Manager. If you can right-click your Disk as we did before and choose Convert to GPT Disk, try that.
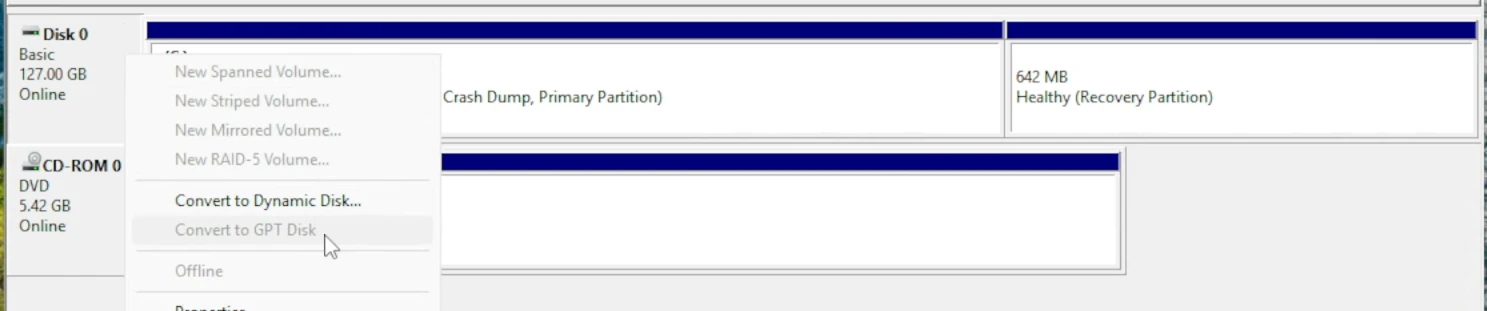
Assuming that isn’t possible, we will need to use some commands. Remember the disk number from Partition Manager! Mine is Disk 0.
Method 2: Commands
Hit Start or Windows and search for CMD. Open Command Prompt as Administrator.
Verify the drive can be converted with the command: mbr2gpt /validate /allowFullOS.
If your drive is anything other than Disk 0 use the command: mbr2gpt /validate /disk:1 /allowFullOS where disk:1 is your disk number.
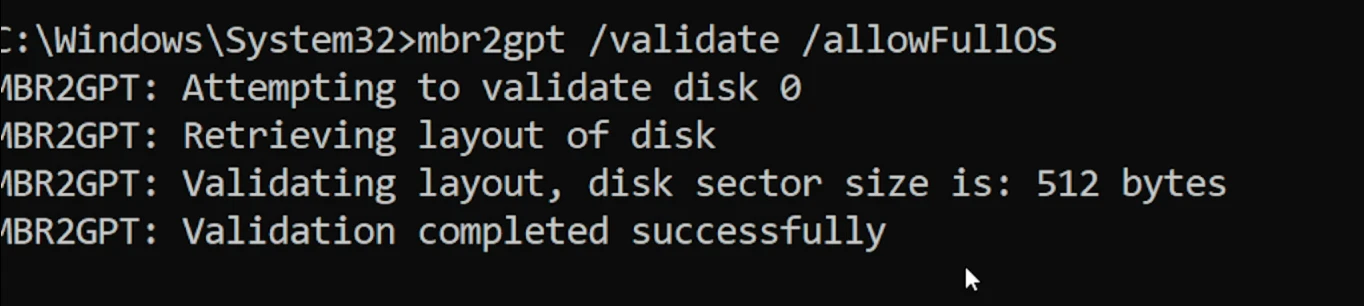
If you see no errors as above; run the command: mbr2gpt /convert /allowFullOS
If you’re on another disk, use mbr2gpt /convert /disk:1 /allowFullOS as we did before.

Now that the conversion is complete, we need to make sure UEFI mode is enabled to continue.
Enable UEFI mode
Returning to our Google search we did earlier, we’ll actually enable UEFI mode this time.
Google <Manufacturer> <Motherboard Name> Enable UEFI, for example: Gigabyte Z790 AORUS MASTER Enable UEFI to find a guide specific to your motherboard as every board is different - even within the same generation from the same manufacturer.
Alternatively, see the related Enable UEFI guides I’ve got below:
Steps to enable UEFI mode
Usually enabling UEFI mode requires entering the BIOS/UEFI settings and choosing UEFI Mode next to Boot Mode. Often this can be renamed as something like Disable Legacy Mode or Disabe CSM support. While you’re there it’s also a good idea to enable Secure Boot mode - though this may interfere with dual-booting if you have both Windows and Linux installed, for example.
To get to your BIOS/UEFI settings quickly: Press Start/Windows and search for CMD. Open Command Prompt as Administrator.
Use the command shutdown /r /fw to reboot your system straight to your firmware settings screen.
As soon as you hit Enter, your system should reboot.
Alternatively, restart your computer as normal, and press the key shown during the boot process to open your firmware settings. This can be F8, F12, Delete or any other combination of keys.
Refer to a manufacturer-specific guide linked above, or your Google search for exact steps for your motherboard. Most likely the settings you’re changing should look like the following once you’re done:
- BIOS or Boot > CSM Support:
Disabled - UEFI/BIOS Boot Mode:
UEFI - Security > Secure Boot:
Enabled
Once you’ve made these changes: Save and exit. When you return to Windows you should now have UEFI mode enabled - as well as Secure Boot if you toggled that on letting you play Battlefield 6, Black Ops 7 or use any software which required these settings.
If you need to enable Secure Boot and TPM, make sure to check out these guides:
